Banana Crumble with Homemade Custard

This is 29 Acacia Road, and this is Eric the schoolboy who leads an amazing double life. For when Eric eats a banana an amazing transformation occurs. Eric is Bananaman. Ever alert for the call to action! (Bananaman: TV series 1983-1986)

Banana Crumble

Banana Crumble

I was fortunate enough to be given some vanilla pods for Christmas. I had seen them being used before on television and couldn’t wait to split those pods open and scrape out the seeds. My next thought was what shall I make. I had some double cream leftover from making truffles, ripe bananas that needed using and some ground almonds that were fast going out of date. And what does this all make I hear you ask?! It can only be a delicious banana crumble with homemade custard!!!

Banana Crumble with Homemade Custard

(4 portions)

Ingredients

2- 3 bananas
75gr. plain flour
25 gr. butter
25 gr. oats
35 gr. ground almonds
2 tbsp. caster sugar
1 tsp. cinnamon
½ tsp. all spice
For the custard:
280 ml tub of double cream
1 vanilla pod, split in two and seeds scraped out
3 egg yolks
1 tsp. corn flour
1 tbsp. caster sugar

Method

  1. In a large bowl rub together the plain flour and butter until it becomes a breadcrumb texture.
  2. Add the oats, ground almonds, caster sugar, cinnamon and all spice, then stir until it is all well incorporated.
  3. Preheat oven Gas 6/ 200 C
  4. In a small pie dish (15- 20cm diameter) chop up 2- 3 bananas and cover the base of the dish.
  5. Sprinkle on the crumble mixture and make sure it is fully covered. You may have a little bit of mixture leftover.
  6. Place into the oven for 20 minutes or until it has got a golden colour on top.
  7. While the crumble is in the oven, pour the cream into a saucepan.
  8. Split the vanilla pod in two and scrape out the seeds, then add the seeds and the pod to the saucepan.
  9. On a low heat, warm up the cream up until near boiling point.
  10. In a large measuring jug add the egg yolks, cornflour and caster sugar and whisk together.
  11. Once the cream is ready, take out the vanilla pod.
  12. Gradually add the cream to the egg yolks (just add a little bit to start off with so the mixture doesn’t scramble)
  13. Once all the cream has been added, pour back into the saucepan.
  14. On a low to medium heat, stir the custard until it thickens. Don’t let the mixture boil.
  15. You will know the custard is ready when the custard coats the back of a spoon.

Suzy Says:

  • The all spice adds a real flavour kick. Feel free to experiment with others.
  • Baileys truffles are a great use of any spare cream…or it’s a good excuse to make them at the very least!

Gingerbread Biscuits

Run, run as fast as you can! You can’t catch me, I’m the Gingerbread Man!(Taken from the Gingerbread man song, Unknown)

Gingerbread Biscuits

Gingerbread Biscuits

If you haven’t already done so, it’s time to put up the Christmas tree, yippee!  Although you can’t go wrong with baubles, tinsel and lights- I love having a sweet treat up there as well. Purple foil-wrapped Cadbury’s chocolates hanging from gold thread are a favourite in my household but this year I’m going to try making decorations out of gingerbread.
I have some wonderful cookie cutters in the shapes of snowflakes and Christmas trees and I’ve been dying to try them out. I sometimes struggle making biscuits but these have worked out really well. I hope you like them too!

Gingerbread biscuits

(makes lots)

Ingredients

350 gr. Plain flour, plus extra for kneading and rolling out.
180 gr. Light soft brown sugar
130gr. Butter
1egg
4tbsp. Golden syrup
1tsp. Bicarbonate of soda
1tsp. Ground cinnamon
2tsp. Ground ginger

For decoration

Zest and juice of half an orange
200 gr Icing sugar
a little water may be necessary.

Method

  • In a large bowl, mix together the flour, cinnamon, bicarbonate of soda and ginger. I like mixing with a knife.
  • Add the butter and use your fingertips to mix until it looks like breadcrumbs.
  • Stir the sugar into the mix.
  • In another bowl, (I use a measuring jug), lightly beat the egg and syrup together.
  • Use the knife to mix until fully incorporated.
  • Next, knead the mix with your hands, adding extra flour where necessary, to bring to a smooth ball.
  • Wrap the dough in Clingfilm and leave it in the fridge to chill for at least half an hour.
  • Preheat the oven to 180C/Gas 4
  • Line a baking tray with baking or greaseproof paper.
  • Roll the dough out to no more than half centimetre. Preferably slightly less but not too thin either.
  • Using your cutter, preferably a lovely Christmas one, cut out the shapes.
  • If you do intend to hang them on your Christmas tree, use a skewer to make a small hole at the top of each biscuit.
  • Bake for 12-15 minutes, or until lightly golden brown.
  • Leave on the tray for 10 minutes before transferring them to the cooling rack.
  • To make the icing, add the icing sugar into the bowl, add the juice and zest and mix together until smooth but not runny.
  • Put the icing sugar in a piping bag and decorate in a pattern of your choosing.

Suzy says

  • I have added some edible silver balls to my biscuits- let your festive inner spirit guide you!
  • The orange zest in the icing really adds a kick to the flavour of the gingerbread.

Finally in the words of THE Gingerbread Man from Shrek, ‘ Fire up the ovens, Muffin Man! We got a big order to fill.’

Suzy’s Strawberry Cupcakes

When you look at a cupcake, you’ve got to smile. – Anne Byrn

Suzy's Strawberry Cupcakes

Suzy’s Strawberry Cupcakes

I am pleased to say that the World’s Biggest Coffee Morning – Macmillan Cancer Support at York St John University was a huge success. We raised over £360!
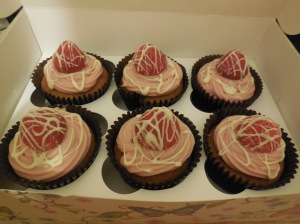
For my entry to the bake-off competition,  I made some strawberry and white chocolate cupcakes. Although they sadly did not win (you can’t win them all I suppose!) they did sell out extremely quickly and I had some really lovely feedback. As such, I feel confident to share this recipe with you. 
One of the trickiest things for me was trying to get a strong strawberry taste but I think (hope!) I have managed it, thanks to Pamela for the tip!

Suzy’s Strawberry Cupcakes

Makes 12

Ingredients

2 punnets of strawberries, washed and hulled
150gr. Self-raising flour
120gr. Butter
120gr. Caster sugar
2 eggs, beaten
1\2tsp. Baking powder
250gr. White chocolate
4tbsp. Double cream
1tbsp. Balsamic vinegar
1further tbsp. Caster sugar
Pink food colouring
(some extra milk)

Method

  1. You will need to make the icing the night before so it firms up enough to pipe onto your cupcakes.
  2. To make the icing, chop up 6-8 strawberries and add to a metal saucepan.
  3. Into the saucepan, add the balsamic vinegar and a tablespoon of caster sugar.
  4. Gently, on a low heat, mash up the strawberries with a fork and mix well.
  5. Once all the strawberries have broken up, pass through a sieve into a jug. You will need 2 tbsp. strawberry coulis for the icing. Leave to cool.
  6. Break up 200gr. white chocolate into a saucepan
  7. Add 4tbsp. double cream to the pan and heat up on the lowest setting until just melted. Stir with a spatula every so often to thoroughly incorporate the cream and chocolate and to ensure the mixture does not burn.
  8. Mix in 2tbsp. of the strawberry coulis. It’s fine if you mix in slightly more, but no more than 3 tbsp.
  9. Pour into a bowl and leave to cool. Once cooled cover with Clingfilm and place in the fridge to firm up overnight.
  10. The next day…
  11. Line a 12 hole bun tin with cupcake cases.
  12. In a large bowl, cream the butter and sugar together until you get a light and fluffy texture.
  13. Add the eggs with half the flour and whisk.
  14. Fold in the rest of the flour.
  15. Blend about 12 strawberries in a food processer, pass through a sieve and add to the rest of the cake mixture and mix through.
  16. You should get a dropping consistency so if the mixture is too liquid, add some more flour, or if it is too firm, add some extra milk until you get the consistency required.
  17. Add an equal amount of mixture to each cupcake case. For this I use an ice-cream scoop which means I get the same size of cupcake nearly every time. My oven seems to have different ideas!
  18. Bake in the oven for 20-25 minutes. They are ready when they are golden brown and you can stick a skewer in the cake and it comes out clean.
  19. After they come out of the oven, place them on a cooling rack to cool.
  20. Take the ganache icing out of the fridge. To make the icing look more pink, add some pink food colouring until it reaches your desired pinkness.
  21. Place the icing into a piping bag and pipe onto the cupcakes.
  22. For the decoration, take 12 small strawberries of equal size and dry them off as much as you can. Place onto the middle of the cupcake.
  23. Melt 50gr of white chocolate. (I melt the chocolate in a microwaveable bowl at 20 second intervals, stirring between each interval.)
  24. Drizzle over the cupcakes as per the picture above.

Suzy says:

  • Although they may take longer than normal cupcakes, I think the result is worth the time. I have been working on my decoration skills and this is one I was really pleased with.
  • Adding balsamic vinegar does seem to intensify the flavour of the strawberries and I would like to thank Pamela for this tip.

Carroty Cupcakes

What’s up doc? (Bugs Bunny)

Carroty Cupcakes

Carroty Cupcakes

Following the several healthy recipes I have trialled over the past few weeks, I wanted to go back to what I do best….. baking cupcakes! However, I couldn’t abandon my “summery” emphasis entirely so have decided to try my hand at carrot cake cupcakes. Here is my recipe 🙂

Carroty Cupcakes

(Makes 12 cupcakes)

Ingredients

For the cupcake mixture

3 medium carrots, peeled and grated
120 gr. soft light brown sugar
120 gr. butter
180 gr. self raising flour
2 medium sized eggs
1 tbsp. golden syrup
1 tsp. cinnamon

For the cream cheese icing

50 gr. butter
100 gr. cream cheese
1 tsp. vanilla extract
225 gr. icing sugar

Method

  1. Line a 12 tin cupcake tray with 12 cupcake cases
  2. Pre-heat the oven at 180C/gas 4
  3. Cream the butter and sugar together in a large bowl until you get a lighter consistency.
  4. Stir in the golden syrup and carrots until well combined
  5. Crack two eggs into the mixture and add the flour and cinnamon.
  6. Beat until combined. You should have a dropping consistency. If not, add a little milk until you do.
  7. Spoon into the cupcake cases.
  8. Bake in the oven for 20-25 minutes.
  9. They are ready when you stick a fork in the cake and it comes out clean.
  10. Remove and leave to cool completely on a cooling rack before icing.
  11. For the icing, combine all the ingredients and whisk until you get a smooth consistency.
  12. Place the mixture in a piping bag and pipe onto the cupcakes.
  13. If you don’t have a piping bag, spread some icing over the top.
  14. Serve and enjoy

Suzy says

  • Add a walnut onto each cupcake for decoration and some additional cinnamon into the icing for extra zing!

bon appétit

Banana Cake

Let them eat cake (Marie Antoinette)

Banana Cake

Banana Cake

I love using bananas in my baking and so this week, I opted to make the most of my overripe fruit bowl! I hope you like the recipe.

Banana Cake

Makes around 12 slices

Ingredients

285 gr. plain flour
1 tsp. baking powder
110 gr. butter
100 gr. caster sugar
115 gr. soft brown sugar
2 free range large eggs
4 ripe bananas
85 ml natural Greek yoghurt
1 tsp. vanilla extract

Method

  1. Preheat the oven to Gas 4/180C/350F.
  2. Grease a 20cm loaf tin.
  3. In a large bowl, cream together the butter and sugar until light and fluffy.
  4. In a separate bowl, mash the bananas with the yoghurt and vanilla essence, then stir into the butter and sugar mixture.
    Add the eggs and mix well.
  5. Fold in the flour and baking powder until well incorporated.
  6. Pour the mixture into the loaf tin.
  7. Place into the oven for about an hour or until well risen and golden.
  8. Take out of the oven and leave in the tin for a few minutes before turning it out onto a cooling rack.

Suzy says

  • No need to ice the cake, it is lovely just as it is!
  • If you have any more overripe bananas, chop them up and put them in the freezer to make my Suzy sorbet 🙂


Chocolate Cornflake Cakes

There is nothing better than a friend, unless it is a friend with chocolate (Charles Dickens)

Chocolate Cornflake Cakes

Chocolate Cornflake Cakes

Who would have believed that cornflake cakes would be my first blogger’s hurdle?! Well, it’s only taken me three attempts and although I really wanted to make these as an Easter treat, I have finally managed to produce a batch I am happy with. Thank you to my mother-in-law Carmen from who I have adapted this recipe – I think it is awesome and I hope you agree!

Chocolate Cornflake Cakes

makes 12 cakes

Ingredients

3 full size mars bars
50 gr. milk chocolate
85 gr. margarine
114 grams cornflakes
2 packets of Smarties

Method

  1. Place 12 cupcake cases into a muffin tin.
  2. Chop up the mars bars and put them in a saucepan with the butter.
  3. On the lowest heat setting, stir until melted. (You may need to take the pan off the heat and stir until fully incorporated
  4. Add the cornflakes into a bowl and stir in the melted chocolate until all the cornflakes have been covered.
  5. Using your hands make 12 cornflake balls and place them in the cupcake cases.
  6. Add three Smarties on top of each cupcake case.

Suzy says:-

  • At Easter time, you can try using mini eggs instead of Smarties.
  • I tried the mixture with bran flakes after my first successful attempt and they were awesome too!
  • I use my hands to cover the cornflakes with chocolate but always wear gloves (to keep my skin young and beautiful!)

Hot Choc Buns

Good Friday comes this month, the old woman runs, with one or two a penny hot cross buns (Poor Robin’s Amanack (1733) )

Hot Choc Buns

Hot Choc Buns

I always like to make an effort to bake something traditional and seasonal to mark special times of year and so last Easter, I  decided to try my hand at Hot Cross Buns. Only trouble is, my husband and I both can’t stand dried fruit, so as usual I opted for chocolate instead!

My first attempt was using a gluten-free recipe, which we both loved, but didn’t keep fresh for very long.  This year, I opted instead for the ‘gluten-full’ version as I was keen to try my skills at kneading dough. We loved this too!

Hot Choc Buns

(Serves 12)

Ingredients

625 grams strong white flour
1 1/2 tsp. fast action yeast
1 tbsp. sugar
1 tbsp. honey
1 tbsp. cocoa powder
1tsp salt
50 grams of butter plus extra butter for greasing.
1 egg
275 ml milk
100 grams white chocolate
100 grams milk chocolate
1 tsp. cinnamon

For the topping

75 grams white chocolate
1 tbsp. golden syrup
1/2 tsp. of cinnamon

Method

  1. Add the flour, salt, cocoa and cinnamon into a large bowl.
  2. Rub in the butter to the flour mixture.
  3. Make a well and add in the honey, sugar and yeast.
  4. Beat the egg and add into the mixture.
  5. Heat the milk in a microwave for about a minute (until it is slightly warmer than room temperature) Add the milk into the mixture and mix together to form a dough.
  6. On a lightly floured surface, turn out the dough and flatten as much as you can.
  7. Add half the white chocolate and milk chocolate and work into the dough.
  8. Flatten the dough out again and work the rest of the chocolate into the dough.
  9. Knead the dough for approximately 5 minutes until it is smooth and elastic.
  10. Shape the dough into a ball shape.
  11. Grease the large bowl with butter and add the dough into the ball.
  12. Cover with a clean tea towel and place the bowl in a warm place for an hour to prove.
  13. After an hour, place the dough on a lightly floured surface and knock back ((??)) the dough.
  14. Shape it into a ball and place back into the bowl, cover with the tea towel and leave to rise for a further 30 minutes.
  15. After 30 minutes, turn the dough out onto a lightly floured surface, divide the mixture in two, roll out each of the two parts and divide each part into 6 equal pieces.
  16. Roll each piece into a ball and then flatten slightly to make a bun shape.
  17. Cover the 12 buns and leave to rest for 5 minutes.
  18. Grease a baking tray with butter (I greased two smaller baking trays as my oven isn’t that big) and add the buns to the tray(s).
  19. Completely cover the buns with cling film and leave to rise for 40 minutes Preheat the oven to 230C/gas 8. (I put my oven on about 15 minutes before I put the buns in the oven.)
  20. Place the buns in the oven for 10 minutes.
  21. While the buns are baking, place the golden syrup into a bowl and stir.
  22. Heat the golden syrup up in the microwave for 10-15 seconds.
  23. As soon as the buns are ready, brush the golden syrup over the buns, then place them on a wire rack to cool.
  24. After they have cooled, melt the white chocolate. To melt, I chop up the chocolate, place it into a microwaveable bowl and heat for 20 seconds at a time until just melted. In between each 20 second interval, I stir the chocolate making sure the mixture does not get too hot.
  25. Once melted, add to a piping bag and pipe a cross on each bun.
  26. Leave the chocolate to set  and serve!

Suzy says:

  • The buns taste good straight from the oven. But please remember to cool slightly before eating- ‘hot’ should not be taken too literally!
  • If you do not like cinnamon then feel free to leave this out.
  • Use dark chocolate, if you prefer it to milk. The chocolatier the better!
  • The buns taste good with butter spread over them.
  • The only difficult part to this recipe is the kneading of the dough as it is quite stiff.

………….No jokes please about buns in the oven!!

Bon appetit!

Simply Suzy’s Cookies

Sometimes me think, ‘What is friend.’ And then me say, ‘friend is someone to share last cookie with’  (Cookie Monster)

Simply Suzy's Cookies

Simply Suzy’s Cookies

As you might have guessed, I am the office baker (or depending on the day, the feeder or enabler!) and I bring in goodies almost every week for my colleagues. But every now and again, someone else turns up with a recipe of their own which is so delicious, I just have to try it out myself! This is a great example.

A friend of mine brought some cookies to work that she had baked – they were the best I have ever tasted and I had to ask her for the recipe. She originally used Smarties in the recipe but she also tried it with Minstrels (one of my favourite sweets), which worked brilliantly so this is what I have used in the recipe below.  You can of course experiment with other sweets and chocolates of your choice; personally, I think chocolate always works best!

{This recipe also acts as the base to my delicious chocolate orange brownie and white chocolate cookie cake}

Simply Suzy’s Cookies

(Makes 12 -14)

Ingredients

114 grams butter
114 grams of sugar (I use a mix of caster sugar and soft brown sugar)
1 tbsp. golden syrup
170 grams self raising flour
85 grams Minstrels

Method

  1. Preheat the oven to 180C/gas 4
  2. Line two baking trays with grease proof paper.
  3. Cream the butter and sugar together, then stir in the golden syrup.
  4. Mix in half the flour.
  5. Add the rest of the flour and the Minstrels, mix and then knead together.
  6. Divide the mixture into apricot sized balls and place them on the baking tray, ensuring you space them apart. You should fit about 6 balls onto one baking tray.
  7. Place in the oven for 12 minutes until they turn golden around the edges.
  8. Leave to cool and transfer onto a cooling rack.

Suzy says

  • Try adding chopped up white chocolate to the recipe instead of minstrels – delicious!
  • Great with a tea or coffee, of course!
  • And if you have the ingredients in your cupboard, the cookies can be done in the time it takes to drive to the supermarket and back!

Bon Appetit!

Flourless Chocolate Cake

Never be more than 12 steps away from chocolate! (Terry Moore)

Flourless Chocolate Cake

Flourless Chocolate Cake

My husband has suffered from ME for nearly seven years now. Back in 2010, my parents suggested that he should pilot a gluten free diet for a while to see if it would make any difference to his levels of fatigue. We have found this lessens his symptoms to a certain extent and so now we try to avoid gluten whenever possible. I am not saying this will help all people who have ME but it is something that has worked for us.

One of my first attempts to cut out the gluten was a flourless chocolate cake. The recipe I first saw used a lot of icing sugar- too much for my liking, so I experimented with the measurements and added different ingredients like ground almonds and crushed gluten-free cornflakes instead. They all worked! I am determined to carry on experimenting so watch this space…..

Flourless Chocolate Cake (serves 8+)

Ingredients

For the cake mixture

4 large eggs separated
125 grams icing sugar
50 grams ground almonds or an extra 50 grams icing sugar.
100 grams of butter
200 grams of dark chocolate

Decoration

200 grams milk chocolate
200 grams of white chocolate
8 tbsp. double cream plus a bit extra (around 250ml in total)

Method

  1. Preheat the oven to 180C/Gas 4/350F
  2. Take a 20 cm diameter non-stick baking tin and put a circle of baking paper in the bottom.
  3. In a microwaveable bowl, add the 200 grams of chocolate and the butter and heat until melted. Leave to cool. I Microwave the chocolate 15 seconds at a time and stir at each interval, ensuring the mixture does not burn.
  4. In one bowl, whisk the egg whites until it forms stiff peaks.
  5. In another bowl, whisk the egg yolks, ground almonds and icing sugar until incorporated.
  6. Once mixed, fold the chocolate into the egg yolk mixture.
  7. Gradually fold in the egg whites with a metal spoon until there are no white bits. Take it slow and keep as much air in the mixture as possible.
  8. Pour into the baking tin and bake for 30-40 minutes. It is ready when you stick a knife in the cake and it comes out clean.
  9. Take the cake out of the oven and leave to rest before turning it out onto a cooling rack.
  10. To make the ganache icing, melt the white chocolate in a saucepan with 4 tablespoons of double cream. Once it has completely melted, pour into a bowl and leave to cool.
  11. Do the same with the white chocolate.
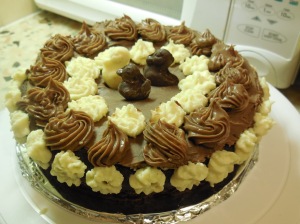
  12. Once cooled, mix some more cream into the mixture until it is loose enough to pipe onto the cake. Design your cake in anyway you like, slice and serve.

Suzy says:

  • The first time I made this cake, I tried whisking the egg whites without an electric whisk. Let’s just say that to form the stiff peaks took some time! So it can be done, but it isn’t advisable.
  • As you maybe can tell, I am no expert with piping but the more I try it, the better I get. One day, I would like to take some courses to perfect my technique but for the time being, I will keep on practising!

Bon Appetit!


Suzy Sorbet (with Raspberries)

If you keep good food in your fridge, you will eat good food. (Errick McAdams)

Suzy Sorbet (with Raspberries)

Suzy Sorbet (with Raspberries)

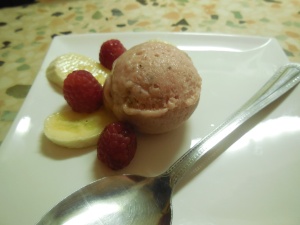
And now for something healthy…..my very own Suzy sorbet! It is prepared without processed sugar or egg whites; in fact, the recipe is simply created from just pure fruit and I have to say it’s delicious. This week I really struggled to come up with a name for my dish (since it has the fruit taste of sorbet with the creamy texture of ice-cream). In the end, I opted for sorbet because it does not have any dairy in it.

If you are wondering how this recipe can taste so delicious, I would say that you would have to try it for yourself! Everyone I have made this for really likes it. It is great for children and adults alike. If you don’t like bananas on their own it’s a great way of hiding them in food and of course, it will count towards your 5 a day!

All that this recipe requires is 4 medium bananas, one other type of juicy fruit and a food processor (you may need some orange juice to add in as well). I have tried this recipe with raspberries, mangos, pineapples, apricots, blueberries and kiwis- my advice is to be experimental! I usually decide on the fruit when I go and see what is on offer at the supermarket which helps to make it as cheap as possible if you are on a budget.

Suzy Sorbet (with Raspberries)

Ingredients

4 medium sized bananas (the riper the better)
1x 150 gram tub of raspberries
(You may need some pure orange juice to hand)

(If you don’t fancy raspberries, I would suggest 1 medium pineapple, 1 punnet of strawberries, 1 tub of blueberries, 4 – 6 apricots, 2 mangos or 6 kiwis)

Method

  1. Cover a baking tray with cling film. I use a 20cm x 30cm tray.
  2. Chop up the bananas into small chunks and place on the baking tray.
  3. Cover the bananas with some more Clingfilm and place into the freezer until frozen (I normally do this 24hrs in advance or I just freeze bananas when they are ripe enough and keep them in the freezer to stop them going off.)
  4. Wash the raspberries and place them in the food processor and blend.
  5. Place a sieve over a big measuring jug.
  6. Pour the raspberries into the sieve and use a spatula to push through as much juice as possible. You should have at least 100 ml of juice. If it is more that is even better.
  7. Rinse the bits out of food processor. You will need to use this again.
  8. Add the frozen bananas and the raspberry juice to the food processor. Blend until smooth, soft and creamy.

Hints:

  • The blending could take a while and you may need to move/shake the processor around to make sure all the banana bits are blended properly.
  • It will be its softest and creamiest when it comes out of the food processor. When frozen overnight, it will be fruitier
  • If the mixture is still a little stiff, here is where you can add a dash of orange juice.
  • Normally, I would use half a tub of raspberries for this recipe but on this occasion, it didn’t produce enough juice so I used the whole tub.

Whatever fruit you are using, it will taste amazing and look lovely and colourful.

I hope to try this recipe with apples one day but if anyone gets there first, please let me know how it turns out.

For now at least raspberries are still my favourite.

Enjoy!