Banana Crumble with Homemade Custard

This is 29 Acacia Road, and this is Eric the schoolboy who leads an amazing double life. For when Eric eats a banana an amazing transformation occurs. Eric is Bananaman. Ever alert for the call to action! (Bananaman: TV series 1983-1986)

Banana Crumble

Banana Crumble

I was fortunate enough to be given some vanilla pods for Christmas. I had seen them being used before on television and couldn’t wait to split those pods open and scrape out the seeds. My next thought was what shall I make. I had some double cream leftover from making truffles, ripe bananas that needed using and some ground almonds that were fast going out of date. And what does this all make I hear you ask?! It can only be a delicious banana crumble with homemade custard!!!

Banana Crumble with Homemade Custard

(4 portions)

Ingredients

2- 3 bananas
75gr. plain flour
25 gr. butter
25 gr. oats
35 gr. ground almonds
2 tbsp. caster sugar
1 tsp. cinnamon
½ tsp. all spice
For the custard:
280 ml tub of double cream
1 vanilla pod, split in two and seeds scraped out
3 egg yolks
1 tsp. corn flour
1 tbsp. caster sugar

Method

  1. In a large bowl rub together the plain flour and butter until it becomes a breadcrumb texture.
  2. Add the oats, ground almonds, caster sugar, cinnamon and all spice, then stir until it is all well incorporated.
  3. Preheat oven Gas 6/ 200 C
  4. In a small pie dish (15- 20cm diameter) chop up 2- 3 bananas and cover the base of the dish.
  5. Sprinkle on the crumble mixture and make sure it is fully covered. You may have a little bit of mixture leftover.
  6. Place into the oven for 20 minutes or until it has got a golden colour on top.
  7. While the crumble is in the oven, pour the cream into a saucepan.
  8. Split the vanilla pod in two and scrape out the seeds, then add the seeds and the pod to the saucepan.
  9. On a low heat, warm up the cream up until near boiling point.
  10. In a large measuring jug add the egg yolks, cornflour and caster sugar and whisk together.
  11. Once the cream is ready, take out the vanilla pod.
  12. Gradually add the cream to the egg yolks (just add a little bit to start off with so the mixture doesn’t scramble)
  13. Once all the cream has been added, pour back into the saucepan.
  14. On a low to medium heat, stir the custard until it thickens. Don’t let the mixture boil.
  15. You will know the custard is ready when the custard coats the back of a spoon.

Suzy Says:

  • The all spice adds a real flavour kick. Feel free to experiment with others.
  • Baileys truffles are a great use of any spare cream…or it’s a good excuse to make them at the very least!

Gingerbread Biscuits

Run, run as fast as you can! You can’t catch me, I’m the Gingerbread Man!(Taken from the Gingerbread man song, Unknown)

Gingerbread Biscuits

Gingerbread Biscuits

If you haven’t already done so, it’s time to put up the Christmas tree, yippee!  Although you can’t go wrong with baubles, tinsel and lights- I love having a sweet treat up there as well. Purple foil-wrapped Cadbury’s chocolates hanging from gold thread are a favourite in my household but this year I’m going to try making decorations out of gingerbread.
I have some wonderful cookie cutters in the shapes of snowflakes and Christmas trees and I’ve been dying to try them out. I sometimes struggle making biscuits but these have worked out really well. I hope you like them too!

Gingerbread biscuits

(makes lots)

Ingredients

350 gr. Plain flour, plus extra for kneading and rolling out.
180 gr. Light soft brown sugar
130gr. Butter
1egg
4tbsp. Golden syrup
1tsp. Bicarbonate of soda
1tsp. Ground cinnamon
2tsp. Ground ginger

For decoration

Zest and juice of half an orange
200 gr Icing sugar
a little water may be necessary.

Method

  • In a large bowl, mix together the flour, cinnamon, bicarbonate of soda and ginger. I like mixing with a knife.
  • Add the butter and use your fingertips to mix until it looks like breadcrumbs.
  • Stir the sugar into the mix.
  • In another bowl, (I use a measuring jug), lightly beat the egg and syrup together.
  • Use the knife to mix until fully incorporated.
  • Next, knead the mix with your hands, adding extra flour where necessary, to bring to a smooth ball.
  • Wrap the dough in Clingfilm and leave it in the fridge to chill for at least half an hour.
  • Preheat the oven to 180C/Gas 4
  • Line a baking tray with baking or greaseproof paper.
  • Roll the dough out to no more than half centimetre. Preferably slightly less but not too thin either.
  • Using your cutter, preferably a lovely Christmas one, cut out the shapes.
  • If you do intend to hang them on your Christmas tree, use a skewer to make a small hole at the top of each biscuit.
  • Bake for 12-15 minutes, or until lightly golden brown.
  • Leave on the tray for 10 minutes before transferring them to the cooling rack.
  • To make the icing, add the icing sugar into the bowl, add the juice and zest and mix together until smooth but not runny.
  • Put the icing sugar in a piping bag and decorate in a pattern of your choosing.

Suzy says

  • I have added some edible silver balls to my biscuits- let your festive inner spirit guide you!
  • The orange zest in the icing really adds a kick to the flavour of the gingerbread.

Finally in the words of THE Gingerbread Man from Shrek, ‘ Fire up the ovens, Muffin Man! We got a big order to fill.’

Suzy’s Chocolate Orange Cake

Chocolate Orange Cake

Chocolate Orange Cake


It’s not Terry’s, it’s mine (Dawn French)

A couple of weeks ago, a friend from work had her leaving do … (very sad face). But it gave me the opportunity to bake her a cake (hooray!) and celebrate along with her!
Although at first, I wasn’t sure what flavour to pick, I knew she liked chocolate orange which left only one choice in my mind. Triple layer chocolate orange cake.
Here is my recipe:

Suzy’s Chocolate Orange Cake

Ingredients

For the cake

350 gr. self-raising flour
325 gr. caster sugar
5-6 eggs, beaten
325 gr. butter
50 gr. dark chocolate
1 bag of mini Terry’s Chocolate Orange pieces, melted
2 tbsp. cocoa powder
1 orange
Milk (may not be needed)

For the chocolate butter icing

225gr. butter
1tbsp. cocoa powder
50 grams dark chocolate, heated in a microwave at 20 second intervals until melted.
450gr. icing sugar

Decoration

1 bag of Mini Terry’s Chocolate Orange pieces.

Extra decoration

I also made a small batch of vanilla butter icing for decoration. This will need an extra 75 gr. butter, softened, 175 gr icing sugar, 1 tsp. of vanilla sugar or extract and whisk all together. You may need some extra milk to loosen the mixture.

Method

  1. Pre-heat oven to 180 Gas 4
  2. For this cake you will need 3 x 20cm round cake tins.
  3. Grease and line each tin with baking paper. I grease my tins with butter (on the bottom and side of the tin) and only place baking paper in the bottom of the tin.
  4. In a large bowl, cream together the butter  and sugar until light and fluffy. For large cakes like this, I use a hand mixer.
  5. Add around a third of the flour and egg and whisk until incorporated.
  6. Whisk in the rest of the eggs.
  7. Fold in the rest of the flour and cocoa powder.
  8. Zest the orange and add to the mixture.
  9. Place the Terry’s Chocolate Orange in the microwaveable bowl and microwave for 20 seconds at a time until just melted, stirring in-between each 20 seconds.
  10. Add the melted chocolate to the cake mixture and stir through until mixed thoroughly.
  11. You should have a dropping consistency at this point, but if you don’t, you can either squeeze in some of the orange or add some milk.
  12. Place a third of the mixture into one of the 20 cm round baking tins and repeat for the other two tins.
    I weigh the mixture into the tins in order to get a similar amount in each tin.
  13. Place the tins in the oven for 20 – 25 minutes until you can stick a fork in it and it comes out clean.
  14. Once the cakes are out of the oven, leave to rest for at least 5 minutes. With a rubber spatula or something similar, go round the edges to loosen any cake that has stuck.
  15. Place the cakes onto a cooling rack and leave to cool.
  16. To make the chocolate butter icing, soften the butter with a knife or fork. Add the icing, cocoa and chocolate and stir/whisk until it has blended together to make a spreading consistency.
  17. If the mixture is too hard, I sometimes add milk to loosen slightly, but just be careful not to add too much.
  18. To build up the layers of the cake, take the first layer and spread the chocolate butter icing over the top and around the sides of the cake.
  19. Next add the next layer and repeat the process and do the same with the final layer.

Suzy says:

  • For the design, I created a web with the vanilla butter icing and placed some Terry’s Chocolate Orange pieces on the top and around the side (but I would love to see any designs you come up with!)
  • I find smoothing icing around the side very difficult. I use a cake decorating turntable and a large palate knife to help with this.

Butternut Squash Soup

Let me be the first to tell you, drinking alcohol is the worst thing to do in cold weather. Hot soup is the best because the process of digesting food helps to warm you up. (Morgan Freeman)

Butternut Squash Soup

Butternut Squash Soup

This week, Butternut Squash soup was top of the menu in the Mills household! It is the perfect dish for a cold, Autumnal evening and really quick and easy to make. I love soups to be as thick as possible; when I was young I used to have a Dutch pea soup that was so thick, you could stick a spoon in and it would be held up! I would love to hear what your favourite flavours are, the more unusual the better! Here is my recipe:

Butternut Squash Soup

Serves 4

Ingredients

2 tbsp. butter
2 medium sized butternut squash
1 small onion
1 medium sized leek
1 small sweet potato
1 chicken/Vegetable Knorr stock pot.
Water to cover the vegetables
1 tsp. turmeric
1 tsp. curry powder
1 tsp. garam masala
2 tbsp. milk
Salt and pepper to taste

Method

  1. Chop up the butternut squash, onion, leek and sweet potato to small pieces (small enough to be blended afterwards)
  2. Melt the butter in a large saucepan on a medium to high heat and add the chopped up vegetables. Stir the vegetables so they are covered fully in the butter.
  3. Turn down to the lowest heat, place a lid on the saucepan and let it reduce for 10 minutes.
  4. Add boiling water to the vegetables, just enough to cover the vegetables.
  5. Add the stock pot to the boiling water.
  6. Leave to simmer for 10-20 minutes or until the vegetables are soft.
  7. Add the milk and stir
  8. Blend with a hand blender until smooth.
  9. Serve.

Suzy Says:

  • Try experimenting and adding any other vegetables.
  • You can leave out the curry powder and turmeric, I just like to add spice to my soups.

Winter Greens Pasta in a Creamy Mint Sauce

Winter Greens Pasta in a Creamy Mint Sauce

Winter Greens Pasta in a Creamy Mint Sauce

No man is lonely eating spaghetti; it requires so much attention. (Christopher Morley)

I don’t know if you are the same but sometimes I get fed up of preparing the same meals each week and so challenge myself to try something completely different with the ingredients I have in stock. During winter, I find myself increasingly hankering for warm and wholesome dishes and this has become one of my recent favourites (particularly when served with a warm bread roll- delicious!) I came up with this recipe and we both adored it so I hope you like it too.

Winter Greens Pasta in a Creamy Mint Sauce

Serves 4

Ingredients

1 large courgette
1\2 a large leek
2 handfuls of frozen peas
A little butter for frying
300 – 400 gr of Spaghetti
100 gr soft cream cheese
2tbsp. mint sauce
Salt and pepper to season

Method

  1. Put a pan of water on to boil. Once the water is boiled, add the spaghetti and cook to the packet’s instructions. I normally break the spaghetti in half before putting it in the pan.
  2. Chop up the courgette and leeks into long thin slices, as thin as you can get them
  3. Melt some butter into a large frying pan or wok on a medium heat and then add the courgettes and leek and fry until soft.
  4. In the meantime, microwave the frozen peas to your packet’s instruction and add to the wok once they are ready.
  5. In a small bowl, mix the cream cheese and mint sauce together.
  6. Turn the heat down on the pan and add the cream cheese mixture.
  7. Stir the cream cheese mixture into the vegetables until it becomes a creamy sauce texture.
  8. Once the pasta is ready, drain and add to the frying pan.
  9. Mix until it has all combined.
  10. Season with salt and pepper to taste. I tend to add a lot of black pepper.

Suzy says:-

  • If you want more of a minty taste, just add more mint sauce
  • You could also experiment with different tastes, such as lemon or garlic or different herbs
  • If you want to reduce the calorific content, you could try using a fat free Greek yoghurt.

Suzy’s Strawberry Cupcakes

When you look at a cupcake, you’ve got to smile. – Anne Byrn

Suzy's Strawberry Cupcakes

Suzy’s Strawberry Cupcakes

I am pleased to say that the World’s Biggest Coffee Morning – Macmillan Cancer Support at York St John University was a huge success. We raised over £360!
For my entry to the bake-off competition,  I made some strawberry and white chocolate cupcakes. Although they sadly did not win (you can’t win them all I suppose!) they did sell out extremely quickly and I had some really lovely feedback. As such, I feel confident to share this recipe with you. 
One of the trickiest things for me was trying to get a strong strawberry taste but I think (hope!) I have managed it, thanks to Pamela for the tip!

Suzy’s Strawberry Cupcakes

Makes 12

Ingredients

2 punnets of strawberries, washed and hulled
150gr. Self-raising flour
120gr. Butter
120gr. Caster sugar
2 eggs, beaten
1\2tsp. Baking powder
250gr. White chocolate
4tbsp. Double cream
1tbsp. Balsamic vinegar
1further tbsp. Caster sugar
Pink food colouring
(some extra milk)

Method

  1. You will need to make the icing the night before so it firms up enough to pipe onto your cupcakes.
  2. To make the icing, chop up 6-8 strawberries and add to a metal saucepan.
  3. Into the saucepan, add the balsamic vinegar and a tablespoon of caster sugar.
  4. Gently, on a low heat, mash up the strawberries with a fork and mix well.
  5. Once all the strawberries have broken up, pass through a sieve into a jug. You will need 2 tbsp. strawberry coulis for the icing. Leave to cool.
  6. Break up 200gr. white chocolate into a saucepan
  7. Add 4tbsp. double cream to the pan and heat up on the lowest setting until just melted. Stir with a spatula every so often to thoroughly incorporate the cream and chocolate and to ensure the mixture does not burn.
  8. Mix in 2tbsp. of the strawberry coulis. It’s fine if you mix in slightly more, but no more than 3 tbsp.
  9. Pour into a bowl and leave to cool. Once cooled cover with Clingfilm and place in the fridge to firm up overnight.
  10. The next day…
  11. Line a 12 hole bun tin with cupcake cases.
  12. In a large bowl, cream the butter and sugar together until you get a light and fluffy texture.
  13. Add the eggs with half the flour and whisk.
  14. Fold in the rest of the flour.
  15. Blend about 12 strawberries in a food processer, pass through a sieve and add to the rest of the cake mixture and mix through.
  16. You should get a dropping consistency so if the mixture is too liquid, add some more flour, or if it is too firm, add some extra milk until you get the consistency required.
  17. Add an equal amount of mixture to each cupcake case. For this I use an ice-cream scoop which means I get the same size of cupcake nearly every time. My oven seems to have different ideas!
  18. Bake in the oven for 20-25 minutes. They are ready when they are golden brown and you can stick a skewer in the cake and it comes out clean.
  19. After they come out of the oven, place them on a cooling rack to cool.
  20. Take the ganache icing out of the fridge. To make the icing look more pink, add some pink food colouring until it reaches your desired pinkness.
  21. Place the icing into a piping bag and pipe onto the cupcakes.
  22. For the decoration, take 12 small strawberries of equal size and dry them off as much as you can. Place onto the middle of the cupcake.
  23. Melt 50gr of white chocolate. (I melt the chocolate in a microwaveable bowl at 20 second intervals, stirring between each interval.)
  24. Drizzle over the cupcakes as per the picture above.

Suzy says:

  • Although they may take longer than normal cupcakes, I think the result is worth the time. I have been working on my decoration skills and this is one I was really pleased with.
  • Adding balsamic vinegar does seem to intensify the flavour of the strawberries and I would like to thank Pamela for this tip.

Vegetarian Quiche

Laughing. Yummy Cupcakes. Getting together….. and helping familys affected by cancer (Macmillan Cancer Support)

Vegetarian Quiche

Vegetarian Quiche

Wow….I can’t believe it’s been so long since I wrote my last post. What have I been doing, I hear you ask!? Well to be honest, I have taken a break from baking but hopefully that will change very soon.
It all starts again with the work Bake Off today. To make the most of my recent impetus, I have decided to try a new recipe and not a tried and tested one. Do you think that is the right thing to do? Well, we shall see. It is all for a good cause; Macmillan Cancer Support – Worlds biggest coffee morning.
If the cupcakes I bake do well, I will share the recipe with you. If not, I will have to go back to the drawing board.
Today, I would like to share my vegetarian quiche recipe with you. It is easier than you may think. I hope you like it.

This recipe requires you to have at least 2 loose-based tartlet tins of around 12cm.

Vegetarian Quiche

makes 4 small quiche’s

Ingredients

140 gr. rice flour
140 gr. plain flour
90 gr. butter
8-10tbsp. cold water
140 ml double cream
2 eggs
Salt and pepper to season
150-200 gr cheese, grated
Half a red onion
1 tomato
Half a medium courgette
3-4 grilled artichokes from a jar
5 small mushrooms
Half a large red pepper
Some oil for frying

Method

  1. To make the pastry, mix the two flours in a large bowl, add the butter and rub into the flour with your fingertips until it resembles breadcrumbs.
  2. Add the cold water 1 tbsp. at a time until the flour comes together to form a dough.
  3. Cover the dough in Clingfilm and leave in the fridge for at least 20 minutes, but longer if you have the time.
  4. Once the pastry is ready, divide into 4 equal pieces.
  5. Preheat the oven to 190C / gas 5
  6. Roll out each piece until it is slightly larger than your tin. I only have two tartlet tins, so I make 2 the first day and then 2 the following day.
  7. Lift the pastry into the dish and press into the bottom and sides.
  8. Trim the pastry that overlaps the dish to neaten the edges.
  9. Prick the bottom of the pastry several times with a fork.
  10. Tear off a piece of baking paper to the size of the tartlet tin and place onto the pastry. Add baking beans on top of the baking paper. If you don’t have baking beans, you can use some uncooked rice instead.
  11. Bake in the oven for 10 minutes.
  12. After the pastry case’s come out of the oven, remove the baking beans and baking paper and put the pastry in the oven for a further 5 minutes.
  13. Whilst the pastry is in the oven, whisk the eggs and double cream together in a big measuring jug.
  14. Chop up the vegetables as small as possible and lightly fry the ingredients in a frying pan until soft. You do not need to fry the tomatoes.
  15. Once the pastry case’s are out of the oven, add a layer of cheese so it lines the base.
  16. Spoon your fried veg and chopped tomatoes and fill the pastry cases to almost the top, leaving enough space to add another layer of cheese.
  17. Pour over the egg mixture so it fills the quiche. Leave about 5mm gap at the top.
  18. If you would like to put a decoration on the top, you could add slices of mushroom or tomatoes.
  19. Put the dishes in the oven for a further 30 minutes or until golden brown and firm to touch.

Suzy says:

  • These are great to eat cold at a picnic or heated up in the microwave to eat at work
  • Add a cold carrot salad with the quiche, delicious.

Bon Appétit

Carroty Cupcakes

What’s up doc? (Bugs Bunny)

Carroty Cupcakes

Carroty Cupcakes

Following the several healthy recipes I have trialled over the past few weeks, I wanted to go back to what I do best….. baking cupcakes! However, I couldn’t abandon my “summery” emphasis entirely so have decided to try my hand at carrot cake cupcakes. Here is my recipe 🙂

Carroty Cupcakes

(Makes 12 cupcakes)

Ingredients

For the cupcake mixture

3 medium carrots, peeled and grated
120 gr. soft light brown sugar
120 gr. butter
180 gr. self raising flour
2 medium sized eggs
1 tbsp. golden syrup
1 tsp. cinnamon

For the cream cheese icing

50 gr. butter
100 gr. cream cheese
1 tsp. vanilla extract
225 gr. icing sugar

Method

  1. Line a 12 tin cupcake tray with 12 cupcake cases
  2. Pre-heat the oven at 180C/gas 4
  3. Cream the butter and sugar together in a large bowl until you get a lighter consistency.
  4. Stir in the golden syrup and carrots until well combined
  5. Crack two eggs into the mixture and add the flour and cinnamon.
  6. Beat until combined. You should have a dropping consistency. If not, add a little milk until you do.
  7. Spoon into the cupcake cases.
  8. Bake in the oven for 20-25 minutes.
  9. They are ready when you stick a fork in the cake and it comes out clean.
  10. Remove and leave to cool completely on a cooling rack before icing.
  11. For the icing, combine all the ingredients and whisk until you get a smooth consistency.
  12. Place the mixture in a piping bag and pipe onto the cupcakes.
  13. If you don’t have a piping bag, spread some icing over the top.
  14. Serve and enjoy

Suzy says

  • Add a walnut onto each cupcake for decoration and some additional cinnamon into the icing for extra zing!

bon appétit

Bolognese Pasta Bake

Penne for your thoughts (unknown)

I’ve been experimenting with new recipes which still need some tweaking before I post them.  In the meantime, try my Bolognese Pasta Bake:

Bolognese Pasta Bake

(Serves 6)

Ingredients

Bolognese Pasta Bake

Bolognese Pasta Bake

200-250 gr. turkey mince
1 tbsp. tomato ketchup
1 chicken Knorr stock pot
1-2 tbsp. dried basil
Approximately 150 grams frozen mixed peppers
1 large carrot
1 large courgette
1 clove of garlic
1/2 an onion
2 x 400 gram cans of peeled plum tomatoes
1-2 tbsp. tomato purée
A little oil for frying
Salt and pepper
300 gr. Gluten Free penne pasta
Approximately 50-100 grams of cheese

Method

  1. Start by heating some oil in a high sided large frying pan.
  2. Whilst the oil is heating up, mix the tomato ketchup, chicken stock pot, 1 tbsp. of dried basil, some salt and pepper into the turkey mince until well incorporated. (I wear food gloves and mix with my hands.) Don’t overwork the meat.
  3. Add the turkey to the pan and chop up as much as you can with a wooden spoon so the mince covers the pan.
  4. Leave it to cook for a few minutes and keep turning it until it browns.
  5. Add the peppers to the pan and leave to cook In the meantime chop the carrots, courgette and onion into small pieces and add to the pan Crush and chop the garlic as small as you can and add to the pan.
  6. Fry the veg for about 10 minutes.
  7. Blend the two cans of peeled plum tomatoes and add to the pan.
  8. Cook for five to ten minutes until it has reduced slightly.
  9. Preheat the oven to Gas 4/180C/350F.
  10. While this is reducing, place the pasta in a pan of boiling water and boil for approximately 10 minutes, until al dente.
    Spread half the pasta into a Pyrex dish.
  11. Ladle over half the bolognese mixture and grate some cheese over the top Add the rest of the pasta then bolognese and another layer of grated cheese.
  12. Place in the oven for 25 minutes
  13. Once out of the oven, you can portion into 6 servings.

Suzy says

  • Enjoy with a nice salad
  • This meal is great as a lunch.

Kale and Spinach Smoothie

I’m strong to the finish, ’cause I eats me Spinach, I’m Popeye the sailor man!(Popeye from theme song)

Kale and Spinach Smoothie

Kale and Spinach Smoothie

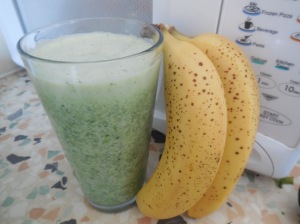
It’s the final week of healthy recipes for my World Cup Workout and I’ve chosen to share a drink recipe that would count towards your 5 a day. You might not think it at first, but it is surprisingly tasty, not to mention filling! If you don’t believe me, all I can say is . . . try it, you might like it!
Don’t tell my husband, but I may actually miss the World Cup once it has finished!

Kale and Spinach Smoothie

(serves 2)

Ingredients

50 grams Kale
70 grams spinach
350 ml milk
1 large ripe banana, sliced into small chunks and frozen
1 tbsp. honey

Method

  1. Place the kale, spinach and milk into a blender and blend until there are no more big bits left.
  2. Add the frozen pieces of banana and the honey and blend until smooth.
  3. Pour into two long glasses and serve

Suzy Says:

  • Experiment with your fruit and veg. I plan to add cucumber or strawberry next time.
  • If you would prefer to avoid dairy, what about trying almond milk instead? This was used in the original post that inspired this post. Do let me know how it turns out – or if you add any of your own ingredients.

Enjoy